Categories
Etching Process

Other Crystal Etching Techniques

Overview:

In decorative glass, award and recognition industries, crystal sandblasting is frequently referred to as “deep-etch engraving“. It is a wonderfully popular technique, with few substitutes. While wheel-engraving is possible, it is incredibly time consuming and skill demanding; acid-etching is extremely dangerous & noxious; and laser-etching has a range of flaws which make it a questionable choice.

Nevertheless, the traditional etching methods remain widely used on specialty glass decorations. There are a number of different methods that can be used for tradition crystal etching.

Wheel Engraving:

Wheel engraving processWheel engraving process
Common referred to as “Hand Carving“, Wheel Engraving is a highly skilled and labor-intensive process. The engraving technique is often described as the most difficult form of engraving to master. As a result, its application on crystal glass was confined to a comparatively small scale and higher-end of the market.

Wheel Engraving use engraving wheels made from carboniferous sandstone or copper that varied in diameter from 5 to 90cm. Each wheel creates a particular effect. Generally, the larger wheel was used for straight lines and gentle curves and the smaller wheel for tighter curves. The engraver sits in front of a bench-mounted lathe turned by an electric motor and holds the glass on his/her fingertips. The surprising and most obvious thing to the onlooker is that the glass is moved and not the tool. What makes it more complicated is that the glass is held behind the wheel not on top. The unusual position gives great control although it seems awkward at first. It requires practice. The technique is often described as the most difficult form of engraving to master.

Detail of brilliant cuts made with a mitre wheel and a round wheelDetail of stipple embossed panel with white acid frosting

Categories
Etching Process

Laser Etched Crystal

What is Laser Etching ?

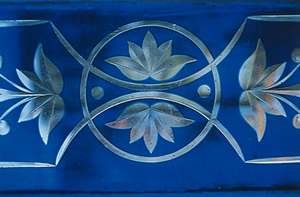
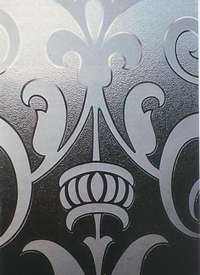
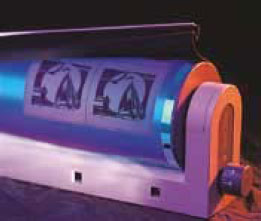
Laser etching is the process of using a laser beam to permanently cut an image or pattern into a hard material, such as glass, crystal, wood or metal. For large projects, the size, depth and location of the pattern is typically programmed into a computer that controls the laser. The strength of the laser is based on the material used and the level of heat required.

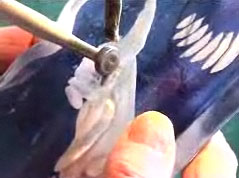
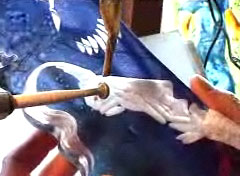
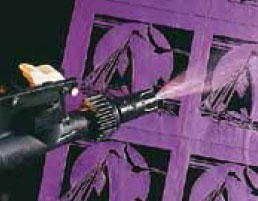
This type of etching is typically found in a manufacturing setting. There are two types of lasers, hand-held and machine-operated. The hand-held units are used by a production technician to correct minor errors or quality issues with the product at the end of the work flow. Artisans or engravers who need to create a very precise work product can also use laser etching as a tool.

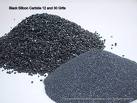
The machine-operated unit is programmed to mass-produce a specific pattern, by etching it into the final material. Common uses of laser etching include circuit boards, engraving metal or carving hard plastic. Lasers are rarely used for wood, as they tend to leave burn marks on the surface of the wood.

3D Laser Crystal Etching Process


Buy software needed for 3D laser etching

  1. Point-cloud converting software
    used for converting BMP, ASC, DXF etc image file format to another image file format which consist of abundant small points.
  2. Engraving control software
    used for controlling the laser beam output interval and the directory of laser beam or X/Y/Z axis. LF-200 only need Z axis works, and the software control the worktable, laser and scanning mirror all.

Be familiar with 3D laser etching workflow:

  1. 3D Camera Head Image > 3D Camera > Laser3D Software Generate Point Cloud > Machine Machining > 3D Laser Crystal Final Product
  2. Digital Camera Photo > Adobe Photoshop Software Design > Laser3D Software Generate Point Cloud > Machine Machining > 3D Laser Crystal Final Product

Design portrait with point-cloudy image:

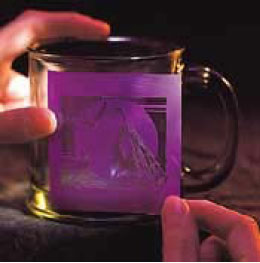
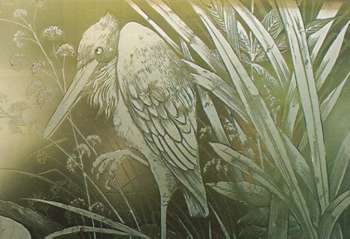
All designs for 3D laser crystal etching are made entirely of points because the process offers no way to draw continuous lines or surfaces. However, with small enough points it’s possible to arrange them into convincing curves, surfaces and volumes. Point-cloud image consists of abundant small points which are created by the special point-cloud converting software from a common two dimension or three dimension image. These points shall be engraved by laser machine according to the array order one by one. Each point will be burnt inside the transparent material, all the burnt points form the engraved image inside the crystal cube.

Laser etch crystal to draw points:

The points are tiny (.1mm) fractures created by a focused laser beam from 3d laser engraving machine. The conical beam, with a focal length of about 3″, shines into the crystal (glass) without damaging it except at the focal point. At that one point, concentrated energy heats the crystal (glass) to the cracking point, causing a microfracture.
To draw more points, the laser is pulsed on and off. To make the beam move between points, it’s reflected from a mirror that is repositioned between pulses. The mirror is moved by computer-controlled motors, so many points can be drawn with great speed and accuracy. A typical design might use several hundred thousand points, or half a million isn’t unusual in a large block, each placed with .001″ accuracy.

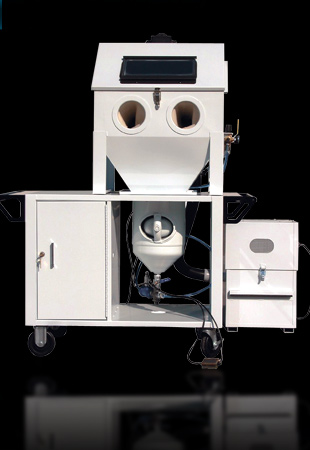
How to select a laser etching machine ?

When selecting a laser etching machine, it is important to consider three things:
WARRANTY, PRICE and OPERATION.

1. The laser etching machine will have to generate significant heat and draw a large amount of power to operate the laser. The risk of components burning out or failing is higher with this type of machine. A good warranty will protect you from repair costs for a specific period of time and allow you to get the value of the unit before needing to invest in repairs.

2. The price of a laser etching machine ranges from $7,800 to $25,000 US Dollars (USD). Take the time to make a list of the features that you require and those that are nice to have but not necessary. Make your selection based on the useful life of the unit. If your business requires a significant amount of etching, the investment in a quality etching machine is worth it. If not, look for a unit that simply meets your current needs.

3. The daily operation of the unit is a very important consideration. Look for a model that is easy to use, with a simple interface, built-in help function and is programmable. Allow the staff who will be using the machine to assist in the product review process. This will reduce the complaints about the machine after it is purchased and will result in a selection that meets the practical needs.

Categories
Etching Process

Crystal Sandblasting Etching Process

Overview:

Crystal Sandblasting is a general term used to describe the act of propelling very fine bits of material at high-velocity to etch the surface of crystal glass.

Sand used to be the most commonly used material, but since silicosis (a lung disease) is caused by extended inhalation of the dust created by sand, other materials are now used in its place. Any small, relatively uniform particles will work, such as steel grit, copper slag, walnut shells, powdered abrasives. Due to the dangers of inhaling dust during the process, sandblasting needs to be carefully controlled, using an alternate air supply, protective wear, and proper ventilation.

In decorative glass, award and recognition industries, crystal sandblasting is frequently referred to as “deep-etch engraving“. It is a wonderfully popular technique, with few substitutes. While hand-carving is possible, it is incredibly time consuming and skill demanding; acid-etching is extremely dangerous & noxious; and laser-etching has a range of flaws which make it a questionable choice.

To etch the crystal glass, the abrasive is blasted onto the crystal surface lightly to turn the glass semi-opaque. This ‘whiting’ or ‘snowing’ of the glass can be used to create various effects on words, images and/or logos. By applying different etching techniques like adjusting the speed/time of the sandblasting, or the angle from which the abrasive being launched, or using a variety of sand coarseness, the glass artists can create limitless designs. The finished crystal glass has a richer texture and differing shades, allowing for some true works of art.

Applications:

Crystal Awards; Crystal Gifts, monuments, etc.

Steps:

Stencil exposureDevelop imageTransfer stencilSandblast

  • Artwork Design

    1. A good design always comes first. Have a procedure in mind before attempting the task.
    2. Measure the exact size of the drawing surface and draw the dimension using a design program such as Adobe Illustrator or Corel Draw. The benefit of creating a vector file layout is that you may apply the artwork later to a different size crystal plaque without the need to re-generate the artwork.
    3. Prepare the artwork. The design layout should contain a detailed description of all patterns, texts and/or logos.
  • Prepare the Stencil

    1. Create the photo resist stencil. Place your printed artwork against the photo resist film to expose the artwork. A vacuum should be used to ensure solid contact b/w the artwork and the film during the exposure.
    2. Develop the film. To reveal the image, the film needs to be sprayed with water to develop. Once the image is fully development, use a blow dryer or pressurized air to remove the excess water from the film.
    3. Transfer film to the crystal surface. Place the film in the correct position on your crystal for sandblasting.
    4. Cover the object. Cover the area not to be etched carefully and expose only the areas to be etched.
  • Sandblasting Etching

    1. Place the object into the sandblasting unit. Hold your sandblasting guy about 6 inches away from the object perpendicular to the crystal surface. Adjust the distance of your sandblasting guy and spraying time based on the fine details of the image you are spraying.
    2. Once completed, double check to make sure you have the desired result.
    3. Remove the stencil by soaking the crystal object for 15-30 minutes. Remove the stencil to review the final product.


Sandblasting Equipments:

A complete sandblasting unit usually consists of the following parts:

  1. A sandblasting unit
  2. An air compressor and air tank to ensure consistent air pressure
  3. Abrasive media: Aluminum Oxide / Silicon Carbide
  4. Photo resist films
  5. High-pressure water sprayer

Sandblasting unit air compressor Abrasive media Water sprayer
The cost of sandblasting equipment depends greatly on the scope of the projects intended. A small home glass carving setup can be acquired for less than US$800, while a system with a cabinet capable of handling larger pieces of glass and more nuanced sandblasting can cost between US$1000 and US$3000. A professional level artistic sandblasting setup will definitely cost in the thousands. Industry level sandblasting equipment also ranges in cost from the mid-hundreds to the high-thousands, again depending on the scale and scope of the projects to be completed.

Categories
Etching Process

Crystal Chemical Etching Process

Overview:

Chemical Etching, also known as Acid Etching, is a process of using a strong acid to cut into another substance. The etching process is used extensively today for both industrial and artistic purposes. We are focusing on the artistic perspective of the acid etching process, which is used primarily to create detailed artwork patterns on metal plate or crystal glass.

Crystal Acid Etching uses an acid solution to cut away the crystal glass in a controlled, even way based on the original crystal design patterns. The acid etched crystal glass has a distinctive, soft matte finish, and leaves a uniformly smooth and satin-like gloss finish. Acid-etched crystal glass admits light while providing softening and vision control. Due to safety reasons, Crystal Acid Etching is rarely used today but it does have a softer, more pleasing appearance than sandblasting etching process.

Detail of white acid triple embossingDetail of stipple embossed panel with white acid frostingA domestic star light with brilliant cut flashed crystal

Applications:

Crystal Nameplates; Crystal Awards; Personalized Crystal Gifts; Decorative Nameplates; Decorative Plate/Doors/Windows

Steps:


  • Artwork Design

    1. A good design always comes first. Have a procedure in mind before attempting the task.
    2. Measure the exact size of the drawing surface and draw the dimension using a design program such as Adobe Illustrator or Corel Draw. The benefit of creating a vector file layout is that you may apply the artwork later to a different size crystal plaque without the need to re-generate the artwork.
    3. Prepare the artwork. The design layout should contain a detailed description of all patterns, texts and/or logos.
  • Prepare the Stencil

    1. A “resist,” usually made of wax, or a similar sticky substance, is placed on the glass where the natural color is to remain.
  • Crystal Etching

    1. Acid etching involves principally the use of hydrofluoric acid, one of the few acids which will rapidly corrode crystal glass. The prepared crystal glass stencil is dipped into a hydrofluoric acid bath. The acid will rapidly frost the unprotected crystal surface. Once reached the desirable depth, the glass will be retrieved for cleaning. The etching process is risky undertaking; hydrofluoric acid is an extremely dangerous chemical and the fumes generated along the process are not only obnoxious, but dangerous.
    2. For average home craft enthusiast, using etching cream will be a much safer alternative for small home project on crystal glass. The etching cream will be wiped over the prepared stencil. It will leave behind a cloudy pattern. These etching cream do not eat into the glass for a permanent etch like hydrofluoric acid does.
  • Cleaning & Presentation