Categories
Etching Material

Etching Cream

Etching cream is an acidic liquid used to permanently highlight cuts made into a crystal surface. This type of cream is typically made from hydrofluoric or sulfuric acid. Etching crystal is a craft that combines powerful chemicals with a fairly simply process to modify the appearance of crystal windows, doors and dishes.

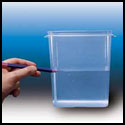
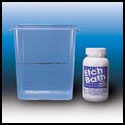
To use etching cream, place the stencil or design against the crystal surface. Secure the cream into place using tape. Tracing the design into the crystal using your knife. Remove the stencil and clean the crystal thoroughly.

The etching cream fills the space in the crystal created by the cuts, so that the lines are visible. When selecting a project to use etching crystal, think about the design, complexity, crystal structural strength, and time required. This type of craft is very manual, providing creative opportunities for skilled artisans.

Buy Etching Cream Online

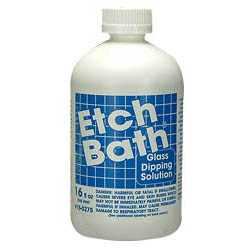
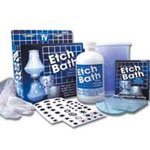
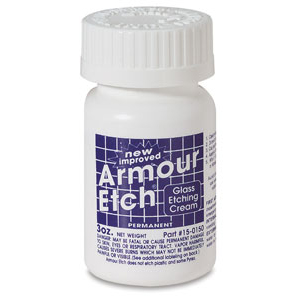
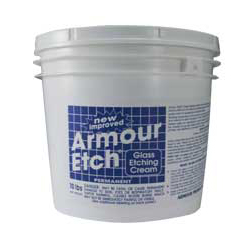
Armour Glass Etching Cream is a fast acting specially formulated crystal etching compound that lets you create permanently etched designs on windows, mirrors and household crystal. Create your own custom crystal etching stencil or use a pre made stencil like Rub N Etch, Over N Over or Peel N Etch. This unique crystal etching system allows anyone to personalize and decorate crystal or mirrors in minutes with no previous experience. Try it, you will love it. Not intended for use by children. Will NOT etch Pyrex or plastices. NOT recommended for etching large solid areas of crystal.

Here are a list of online etching cream resellers, and we will keep it updated:
1. Starting from $8.50 at CraftPeddler.net
2. Starting from $8.50 at EtchWorld.com
3. Starting from $9.34 at StainedGlassExpress.com
4. Starting from $5.85 at DickBlick.com

How to Apply Etching Cream

When applying glass/crystal etching cream, make sure to cover table underneath. Apply etching cream to a glass/crystal etching project with the tips in this free video on how to etch glass/crystal from a crafts expert.

Glass Etching: Applying Etching Cream — powered by eHow.com
Categories
Etching Material

Etch Bath

When you are looking for a method to create an overall etched surface for a favorite glass or bottle…or even searching for a way to add depth and dimension to your glass beads, Etch Bath is the only solution. Liquid solution creates a beautiful matte finish to any clear or colored glass (except Pyrex). Simple to use, application time is only 15 minutes!

When you dip your project into Etch Bath, this quick acting chemcial goes to work producing asoft, overall etched surface. You can eaisly decorate any finished etched project using acrlyic and oil paints, readily available decals, rubber stamps with permanent inks and embossing powders.

Buy Etch Bath Online

Give an overall etched matte finish to household jars, bottles and canisters, just follow the quick and easy directions on the back of the etch bath container. Even glass beads can be given the permanent, soft, subtle, look and feel of frosted glass. Finished product can then be embellished with paint, stickers, stencils, rubber stamps and more. Etch Bath can be poured back into it’s origianl container for future use.

Here are a list of online etch bath resellers, and we will keep it updated:
1. Starting from $25.99 at TheLeisureBoutique.com
2. Starting from $26.95 at DelphiGlass.com
3. Starting from $18.81 at Amazon.com
4. Starting from $48.95 at StallingsGlass.com
5. Starting from $25.99 at AllCraftSupplies.com

Etch Bath Intructions (Brief)

1. Place glass object in empty plastic container. Fill container with water just to cover or to desired etching line.
2. Remove glass object, mark container with felt tip pen, empty water, dry both container and glass object.
3. Pour Etchin Bath Glass Dipping Solution to level of pen mark, let glass object soak 5 to 10 minutes.

Etch Bath Intructions (Detailed)

  1. Clean and dry the glass or mirror thoroughly.
  2. To prepare the beveled ornament for dipping, attach a length of string cut to the size needed to allow you to dip the glass ornament into the Etch Bath solution.
  3. Hang your or-nament inside the dipping container, fill the dipping container with enough water to cover the ornament.
  4. Remove the or-nament and use a crayon or marker to mark the water level on the dip-ping container.
  5. Empty water from container. Thoroughly dry both container & glass ornament.
  6. Put on rubber gloves, keeping them on through remainder of the etching process.
  7. Open the jar of Etch Bath Glass Dipping Solution in-cluded in your kit, stir thoroughly with a wood or plastic stirring stick. Be careful not to splash solution outside of jar.
  8. Slowly pour Etch Bath Glass Dipping Solution to level of pen mark. Re-cap Etch Bath jar.
  9. Return ornament to container and let glass object soak 5 to 10 minutes or more, depending on the type and hardness of the glass.
  10. 10. Remove glass ornament from container and rinse well under running water, beING careful not to disturb stencils. Dry thoroughly and examine etched surface. If etching is in-complete, return glass to container and let it soak a few more minutes before rinsing.
  11. Return Etch Bath Glass Dipping Solution to original jar for re-use. Consult the etch bath bottle for safety precautions.
  12. Allow clean glass to sit overnight, then re-examine. If dried residue remains,wash thoroughly using a brush.